I bought a brand new Segway Ninebot F40 electric scooter. Everything works fine. But I wasn’t quite satisfied with the stopping power.
The scooter comes with a mechanical disc brake at the rear and an electronic brake at the front. Both can be activated with a single brake lever.
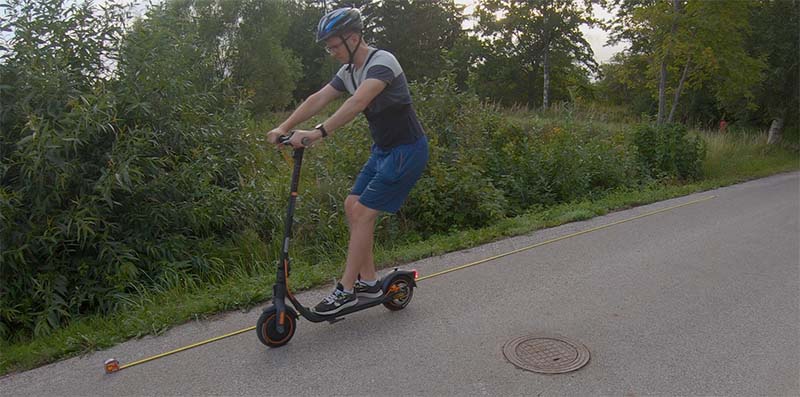
The first braking test looked like this:
- Rider weight: 87 kg (192 lbs)
- I accelerated to the 25 km/h (16 mph)
- Pressed the brake as hard as I could
- Stopping distance: 7m 60cm (25 feet)
For me, this kind of stopping power was not good enough.
So this led me to the need to learn how to adjust the brakes.
Now I can share the knowledge with you.
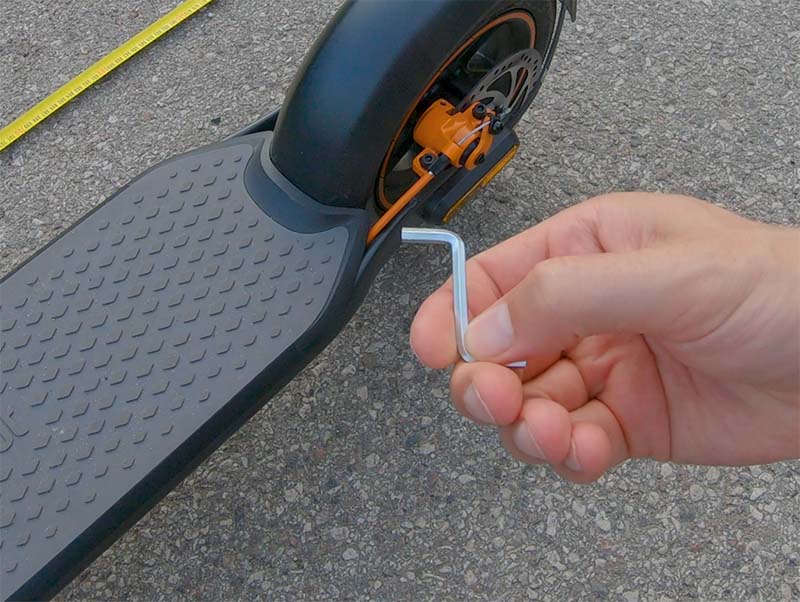
What Tools do You Need?
The only tool I used was a 4 mm Allen wrench.
You might also need an 8 mm open-ended wrench. But I didn’t use that.
There are actually more things you can adjust on the brakes but I show you 2 easy tweaks. Those two adjustments improved the stopping power of my scooter significantly.
Step 1 – Reposition the Cable Clamp
Check if the brake cable has a slack.
If the brake lever is soft and it goes to the bottom very easily, then most probably the cable has a slack.
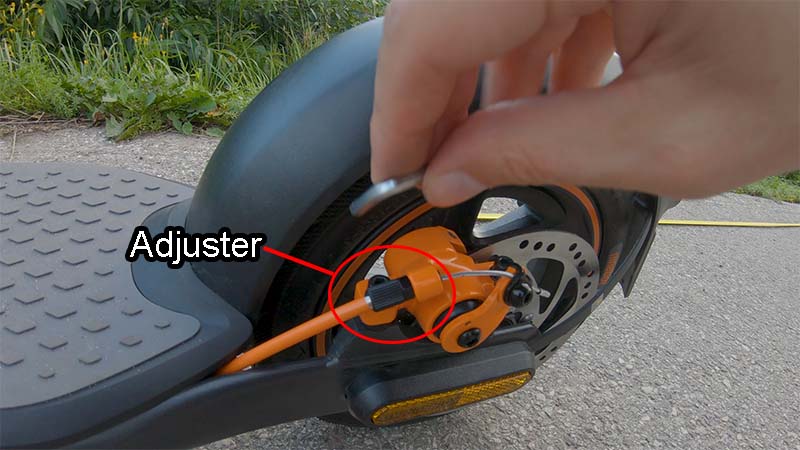
You can add tension to the brake cable by adjusting the adjuster right before the housing of the brake pads. The adjuster looks like a small plastic knob.
You need an open-ended wrench for this method. Also, in this way, only minor adjustments can be done.
Most probably, you need to reposition the cable clamp.
For that, use the Allen wrench and loosen a bit the screw that is holding the cable.
After that, tighten the cable and close the cable clamp.
Now the brake lever should be slightly harder to press because the cable is tighter.
But there’s another thing we can fix. In my case, I even started from step 2, because I clearly saw the problem there.
Step 2 – Realign the Brake Pads Correctly
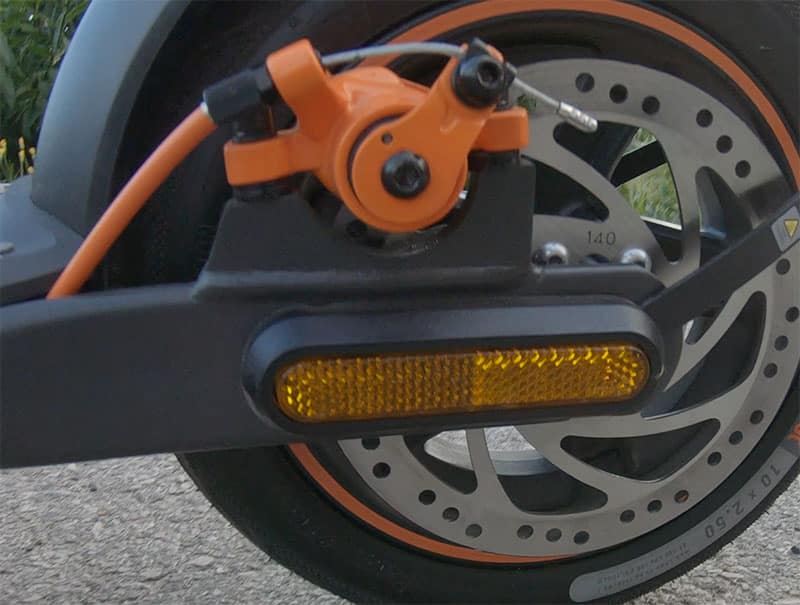
When I looked at the rear disc brake, I saw that the rotor was not centered between the braking pads.
So it was clear that this issue need to be fixed.
First of all, we need an Allen key to loosen the mounting bolts. There is no need to turn those bolts much. Just half a turn or just enough to be able to move the brake caliper.
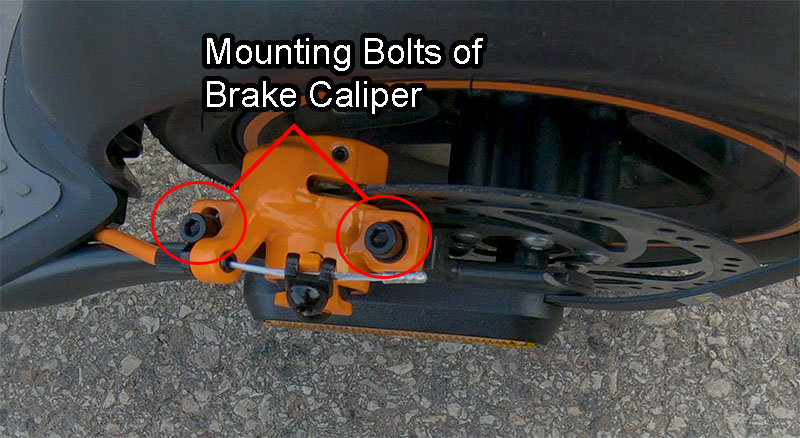
Then align brake pads so the rotor would be exactly between brake pads.
After that, strongly tighten the bolts.
Check If there is No Drag
After adjusting the brake caliper, you have to check if there is no drag. The wheel must roll freely. Otherwise, you have to make readjustments.
Sometimes the rotor may be crooked. Then you need to realign the caliper again.
In my case, the rear wheel runs freely after the realignment of the brake caliper.
Testing the Brakes After Adjustments
Alright, now is the moment of truth. Let’s see if there was any use of this adjusting.
Before, the stopping distance was 7 meters and 60 centimeters.
Let’s do the same test again:
- Rider weight: still 87 kg
- Accelerate to 25 km/h
- Press the brake lever as hard as I can
- Measure the stopping distance
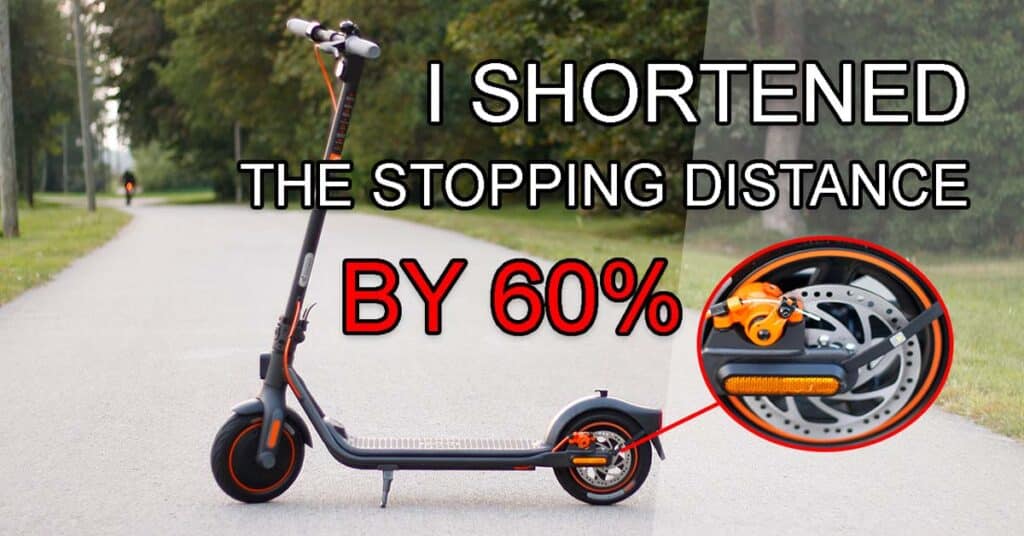
And our work paid off. We managed to stop the scooter within 4 meters and 60 centimeters.
It means, we managed to shorten the braking distance by 3 meters. It’s 60% better than before the adjustment. I’m very happy about the result.
Final Words
It’s not uncommon that the new electric scooter has brakes that are off.
People often think that if something is brand new, it must work flawlessly.
We never know how long the scooter has been in the warehouse and how the transportation went.
Fortunately, adjusting the mechanical disc brakes are easy. By the steps shown in this article, everyone can do it in 10 minutes.

The founder of Electric Wheelers and the creator behind its YouTube channel.
He has spent the past 5+ years riding, testing, and figuring out electric scooters and e-bikes in real-world conditions — not just reading spec sheets.
Instead of chasing trends, he focuses on practical questions:
What actually works? What breaks? And what is worth your money?
Most of the content is based on personal experience, with the goal of helping others avoid mistakes and make better decisions.