
The article is updated in April 2023. We discovered that Engwe has reduced the battery capacity compared to the original model. We added our thoughts about it in the battery section.
Engwe C20 Pro is an affordable folding e-bike that was launched in the spring of 2022.
What are the pros and cons of this electric bike? Is it a buy or not?
In this Engwe C20 Pro review, we are going to find out. Stay tuned!
Electric Wheelers is reader-supported. Although we independently research and test products, we may receive a commission on purchases made from our chosen links. Read more…
Engwe C20 Pro Overview
Engwe Bikes might not be as famous as Rad Power Bikes or Lectric, but they are still tough players in the e-bike industry. Over the last few years, the popularity of Engwe has steadily risen.
So far, Engwe already had popular and affordable electric bike models Engine Pro and EP-2 Pro. In the spring of 2022, they launched new models – Engwe C20 and C20 Pro.
In this article, we mainly focus on the Pro version of the bike. However, if you read on, you can discover that there are only a couple of differences between the Pro version and the Original.
PS! The model was discontinued in the USA. Engwe C20 Pro is only available in Europe.
To Whom?
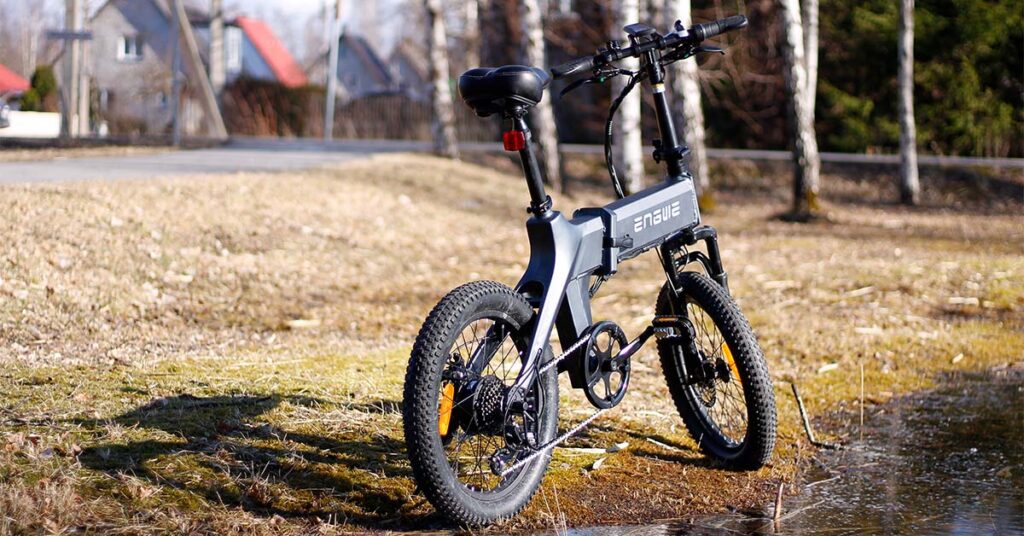
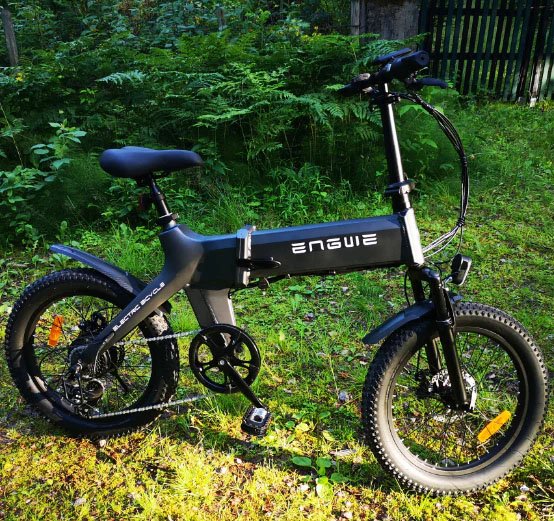
Like the previous models of Engwe bikes, the C20 Pro is also a folding fat tire electric bike. So it’s like 3 bikes in 1.
- A folding frame gives you great portability. It’s easy to store it and the bike can easily fit in the trunk of the car.
- Fat tires expand significantly the type of terrain you can ride on. It’s not a mountain bike but it can easily handle some tougher surfaces.
- An electric motor gives you extra strength to cover longer distances.
So, Engwe C20 is meant for everyday riding and easy commuting.
If your goal is to contribute to a greener future, using an electric bike is the way to go.
Also, this e-bike helps you to get to work or school without getting all sweaty.
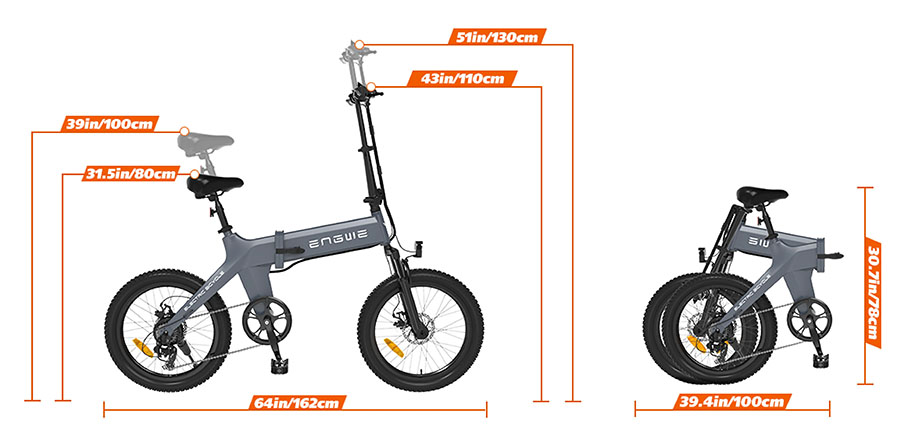
Although the bicycle comes in 1 frame size, the saddle and handlebar height are highly adjustable. Engwe claims that C20 is suitable for people between 5’1″ – 6’10” (155-210cm). So basically, it can suit the whole family.
Our personal opinion is that Engwe C20 is great for short commutes to work or grocery stores. Also, it’s great for exploring the neighborhood.
Engwe C20 Pro Specs
General
| Bike Name | Engwe C20 Pro |
| E-Bike Class | Class 2 |
| Availability | United States, Europe, UK |
| Warranty | 12 Months |
Electronics
| Motor Type | Rear-Hub Drive |
| Motor Power | 250W/500W |
| Top Speed | 16 mph (25kph) |
| Battery | 36V 15.6 Ah (562 Wh) |
| Charge Time | 6 hours |
| Range | Up to 60 km |
| Display | Engwe LCD Display |
Bike Components
| Dimensions | 64″ x 51″ (162 x 130 cm) |
| Folded Dimensions | 39.4″ x 30.7″ (100 x 78 cm) |
| Frame Material | Aluminum Alloy |
| Frame Size | One Size |
| Frame Type | Mid-Step, Folding |
| Frame Colors | Gray, Black |
| Fork | Shock-absorbing fork, mechanical lock |
| Gearing | 1×7-Speed Shimano Tourney |
| Brakes | Mechanical Disc |
| Wheel Size | 20″ |
| Tires | 20″ x 3″ Fat Tires |
| Additional Features | Front Light, Kickstand, Reflectors |
| Weight | 52 lbs (24 kg) |
| Weight Capacity | 330 lbs (150 kg) |
Pros
- Powerful Battery and Great Mileage
- Good Price/Quality Ratio
- More Lightweight Than Previous Models
Cons
- No Braking Light
- No Center Stand/Chainring Guard
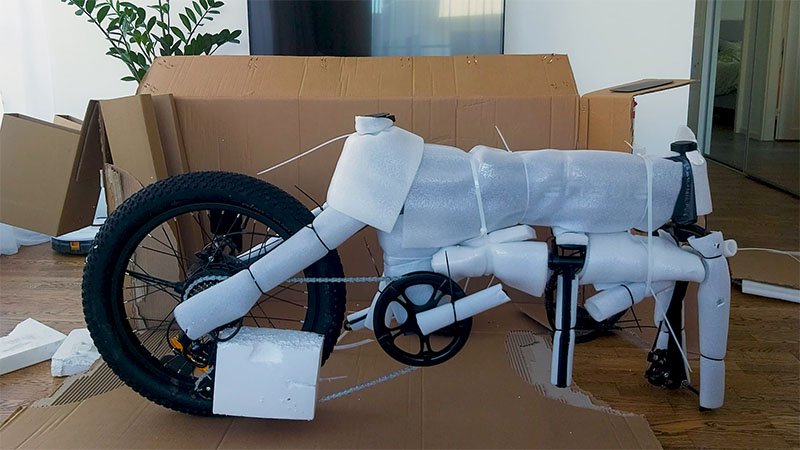
Engwe C20 Unboxing
I was really excited when the courier handed me the big box with an Engwe electric bike in it. You can see my unboxing and assembling experience in the video below:
How to Assemble Engwe C20 E-Bike?
First of all, check that the package is complete and you have all the items listed above. Also, make sure that everything is undamaged.
It may happen that during the transport, something is been damaged.
Then I would suggest reading the assembly guide. It’s quite thorough but it has some shortcomings. But no worries. With the help of this article, you can easily assemble the bike.
Here is a step-by-step guide on how to unbox the folding electric bike and how to assemble it:
- Remove Cushions: The easiest way to remove those cushions is to use scissors or a knife. Be careful when cutting those straps. You don’t want to damage any cables.
- Attach the Handlebar: Take the handlebar subassembly stem and attach it to the upper part of the handlebar. Secondly, you have to fold the handlebar from the quick release. Then you can see there is a hexagon screw that has to be tightened after you attach the handlebar stem to the bike.
- Install the Front Light: Just use those screws that are mounted to the light. When installing the light, you need to use a wrench from one side and a screwdriver on the other side.
- Install the Front Wheel: Remove the transportation bolt from the fork. Turn the bike upside down. attach the wheel in the correct position. Make sure the brake disc goes in between the brake pads. Take the quick-release skewer. Note that the springs must be positioned so the narrower sides are inside. Remove the nut and one spring and insert the skewer from the disc’s side. Then from the other side, attach the spring followed by the nut. Tighten the nut until the lever becomes firm to close.
- Install the Seat Post: Just place the seat post with a saddle where it belongs and tighten it with a quick-release lever.
- Install the Pedals: Make sure to install each pedal to the correct side. Both pedals are marked, so you know which one goes right and which one goes left.
Before the First Ride
While the battery is still charging, you should check some details on your bike. You can take the bike outside without the battery.
- Check all the tightening points of the bike.
- Adjust braking pads accordingly. Make sure the wheels are running freely and there is enough stopping power.
- Adjust the derailleur if needed. It may happen during the transport that the derailleur moves out of place.
When I was testing my bike for the first time, I discovered that some gears were off.
I took the bike to the local service and they fixed it with ease. They also checked other moving parts.
Engwe C20 Pro Performance
Motor and Speed
One of the most important parts of an e-bike is its motor.
Engwe C20 comes with a Bafang 250W rear hub motor. Bafang is a well-known name in the e-bike industry.
Compared to the previous models, the motor of the C20 is less powerful. Both, Engine Pro and EP-2 Pro have a motor of 750W.
However, as I have ridden with EP-2 Pro and now with C20 Pro, I can say that I don’t feel any difference. The torque of the new bike is sharp and enjoyable. However, the top speed of the C20 is slightly less.
The official top speed of Engwe C20 is 16MPH (25KPH). By American standards, Engwe C20 is classified as a Class 2 e-bike.
The e-bicycle law in Europe varies from country to country. However, in most cases, the motor of an e-bike can’t exceed 250W and the top assisted speed can’t be over 25KPH. That’s probably why the motor of the C20 is less powerful than previous models of Engwe bikes.
Upgraded 500W Motor
Later, Engwe upgraded the motor of the C20 Pro, and now it is possible to get it with a 500W motor.
On the site, you can choose between different motor configurations. But in the USA, Engwe C20 Pro is only available with a 500-watt motor.
There are several benefits of the more powerful motor:
- Higher top speed
- Better hill climbing ability
- Better range
- Improved performance in general.
6 Different Speed Modes
You can choose the assistance level as your own preference.
I tested out all speed modes. I am about 200 lbs (90 kgs) and I got the following results:
- Level 0 – Zero assistance. The bike behaves like a non-electric bike.
- Level 1 – Assistance up to 6 mph (10 kph).
- Level 2 – Assistance up to 8 mph (13 kph).
- Level 3 – Assistance up to 11 mph (18 kph).
- Level 4 – Assistance up 15 mph (24 kph).
- Level 5 – Maximum assistance. I got a top speed of 18 mph (30 kph) without pedaling.
The motor works in two ways. First of all, there is pedal assistance. If you start pedaling, the motor kicks in to assist you according to the assistance level you have chosen.
Secondly, if you feel lazy and don’t want to pedal at all, you don’t have to. You can use a half-twist throttle. Then the bike works like a moped.
Battery and Range
The battery of Engwe C20 Pro is one of the strongest parts of this e-bike. However, they have changed the battery from what was originally on the bike.
At first, Engwe C20 Pro had a 36V 19.2Ah battery. There are dozens of YouTube videos that say the bike has a huge 691 Wh battery, which is not true anymore.

Currently, the product page of Engwe C20 Pro says the battery is 36V 15.6Ah. It means the new battery has about 23% less energy capacity.
It gets even more strange. Some newer videos on YouTube say that there is a new 48V 10Ah battery. It means, the battery has only 480 Wh of energy capacity, which would be another 15% capacity cut.
At the same time, Engwe still claims the bike could ride 90 miles, which is really unrealistic.
I tested out the range of the bike, but please note that my bike had a 692 Wh battery.
I only used speed mode 5 and managed to ride 35 miles (57 km) before the battery ran out. It would have been realistic to achieve 80-90 km in lower speed mode. But since the current battery is much smaller, you can count on a significantly lower range.
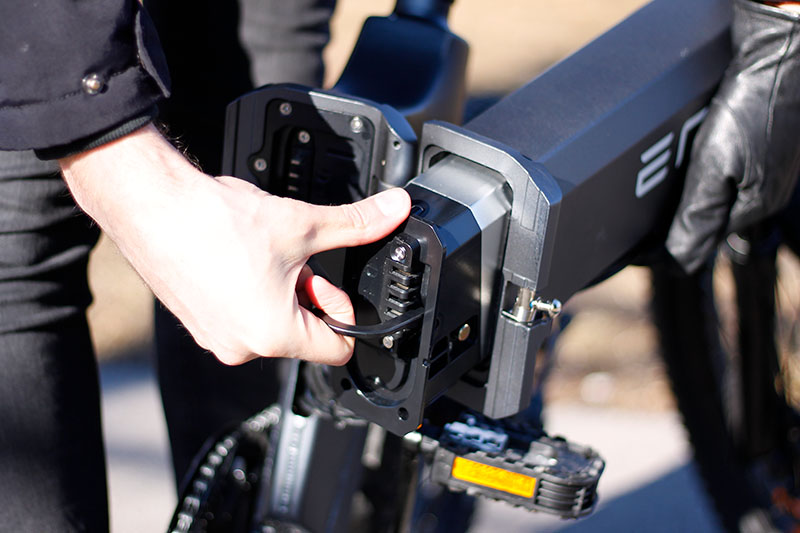
One great thing about this battery is that it’s removable.
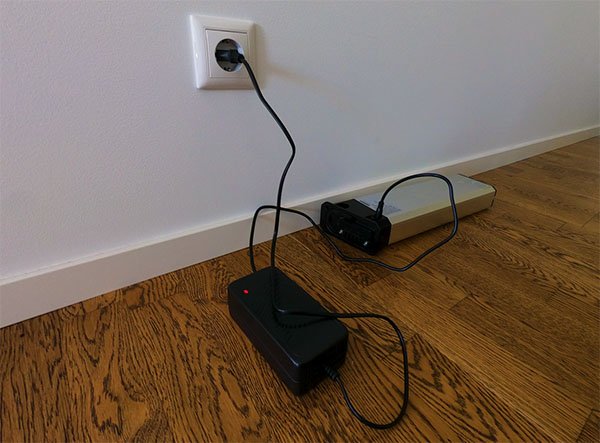
I like it because the storage room where I keep my bike doesn’t have a wall outlet. But if the battery needs charging, I can just take it to my apartment and charge the battery there.
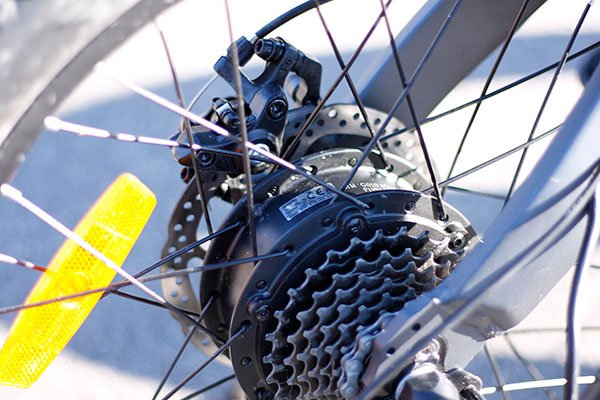
Braking and Gearing
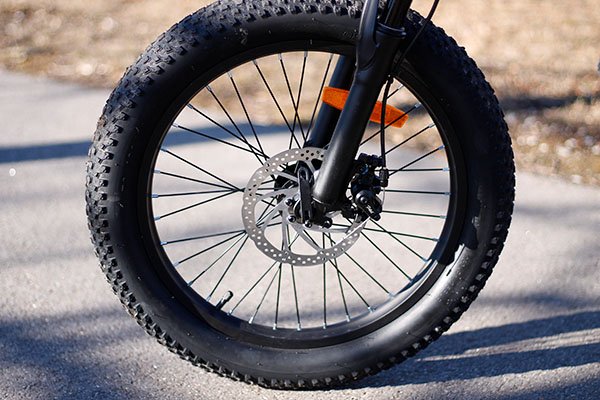
C20 Pro comes with mechanical disc brakes with 160mm rotors.
I would lie if I said that these brakes are brilliant. But if you press hard enough, there will be no problem with stopping power. Hydraulic brakes would be a much better option, but you can’t expect these on a below $1,000 e-bike.
Also, some occasional creaks with mechanical brakes are quite common.
In addition to the speed modes of the motor, the C20 also has a 7-speed Shimano Tourney drivetrain.

Depending on the surface you are riding, you can choose the best gear for you.
Please note that Tourney is Shimano’s cheapest drivetrain. It’s nothing wrong with it but you may need to adjust it every now and then. Also, don’t press hard on the pedals when switching gears. Be gentle when switching gears as it may prolong the lifetime of the derailleur.
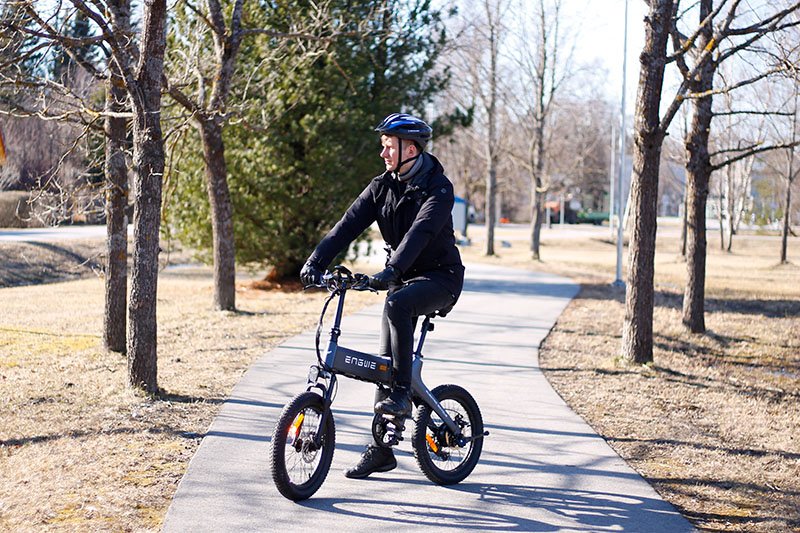
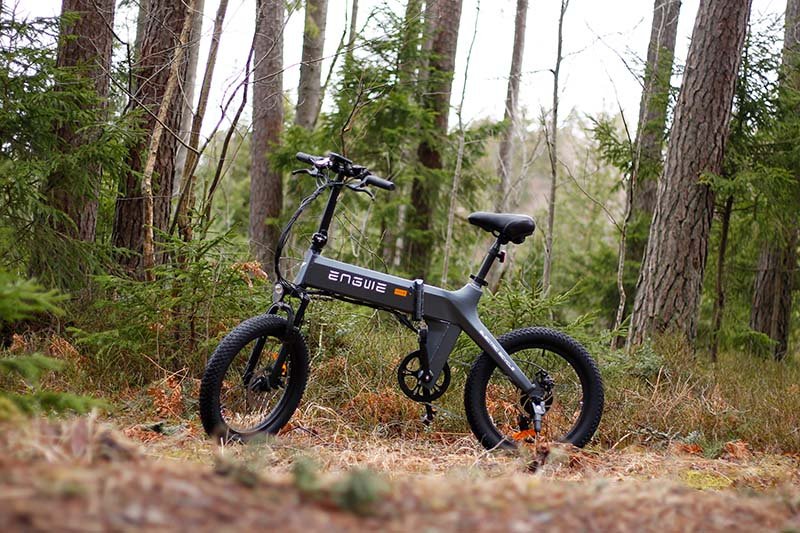
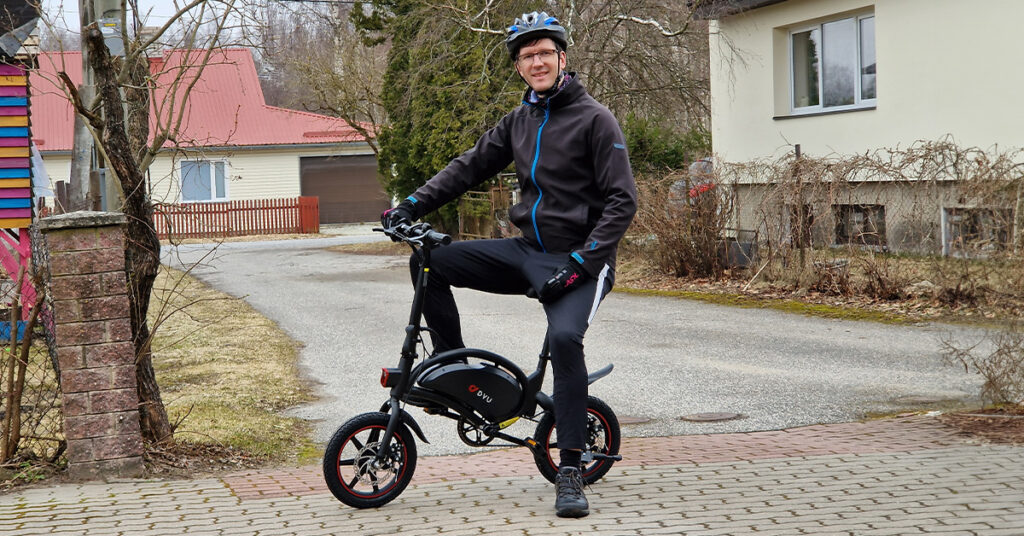
Ride Experience
Riding with the C20 Pro is really enjoyable. You can easily ride with it on almost every kind of terrain.
I have already ridden this bike:
- on smooth asphalt
- in the snow
- in the forest
- on dirt roads
Thanks to the small wheels, it’s very easy to maneuver in a tight area.
I guess that this kind of bike is not meant for people who are used to high-end mountain bikes or ultra-light road bikes.
But for the average person, riding with Engwe C20 is a great experience.
Engwe C20 Pro Design and Features
Frame
Considering the price, the build quality of the bike is solid.
The frame of the C20 is made of solid aluminum alloy. It’s strong enough to support the rider up to 330 lbs. So even heavy adults can easily ride this electric bicycle.
Engwe C20 weighs 18 pounds less than Engwe’s previous bike, EP-2 Pro (52 lbs vs 70 lbs).
Additionally, the C20 has a front suspension fork. It doesn’t have any adjusting or locking features. It’s a cheap shock absorber but definitely better than the rigid fork.
At first, the bike came without fenders, which was a bit odd. However, the company listened to customer feedback and now each bike comes with fenders.
The frame of the C20 has one strange drawback. Usually, folding bikes have an additional chainring guard in case the bike is folded. Engwe C20 bike doesn’t have it. So be careful not to damage the chainring when the bike is folded.
Related: Best Folding Electric Bikes
Handlebar
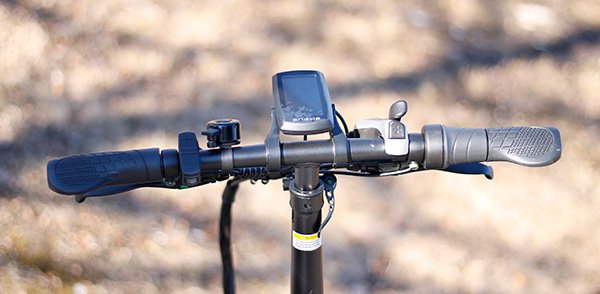
The width of the handlebar is good. It’s not too narrow. Also, the height of the handlebar is well adjustable. I also like the grips. They feel very comfortable and provide nice support to the palms.
The handlebar has all the features that regular bikes have. There are brake levers on the left and right, a Shimano Tourney thumb shifter on the right, and a simple bell on the left.
In addition to those regular bike components, there are e-bike-specific pieces on the handlebar as well.
LCD Display and Throttle
Next to the right-side grip, there is a half-twist throttle. The throttle works very similarly to motorcycles and mopeds.
In the center, you can see a quite big LCD display. The info you can read from it includes:
- Speed
- Level of speed mode
- Battery level
- Trip distance
- Odometer
It’s not a touch display. On the left-hand side, there is a control panel. Using the buttons there, you can increase the speed level, turn on the lights, and access advanced settings.
Overall, I am quite satisfied with the display. It’s big and bright enough to read everything you need.
Wheels and Tires
20-inch wheels are very common for folding bikes. They may seem too small but actually, it isn’t.
Smaller wheels provide much better maneuverability. However, small wheels can also be more dangerous when riding on a bumpy road at high speed.
Compared with Engine Pro and EP-2, the C20 Pro has somewhat narrower tires.
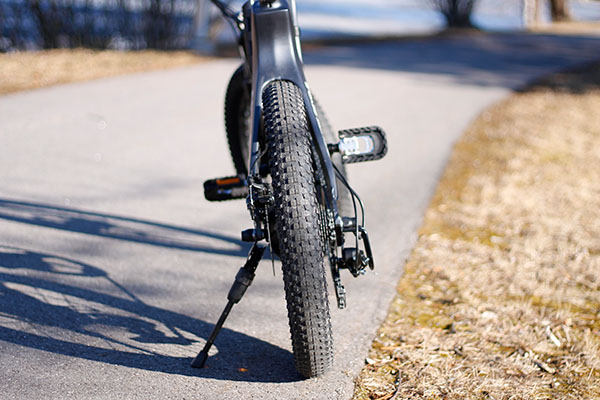
Although I said earlier that the C20 Pro is a fat tire e-bike, it might not be true. Some sources say that fat tires range from 3.7″ to 5.2″.
Engwe C20 Pro has tires with a size of 20″x3″. It doesn’t really matter if these tires are fat or not. Accompanied by a front fork suspension, these tires provide a smooth and stable ride experience on most terrains.
Additionally, these tires have a puncture-resistant feature built into them.
Portability
One of the main reasons I like this bike is its portability.
Although the bike weighs 52 lbs (24 kg), I would still call it highly portable. It’s not this kind of portability, that you can easily haul it several flights of stairs. No, it’s too bulky and heavy for that.
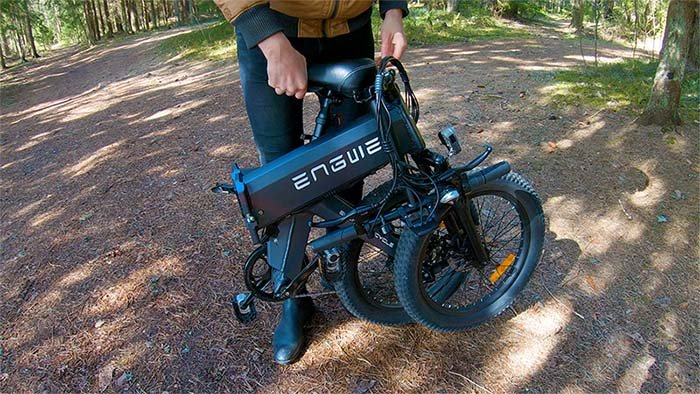
Thanks to the folding mechanism, you can easily fit the bike into the trunk of your car and take it wherever you want.
People often work in the offices downtown, while living in the suburbs. Commuting with cars causes horrible traffic jams. Also, it’s often hard to find a parking spot and it’s expensive.
Even if you don’t want to cycle the whole distance, you can drive to the city limits and continue cycling to the office.
Engwe C20 Folding Mechanism
C20 has a very simple folding mechanism. You can fold and unfold the bike within seconds.
There are two folding points on the bicycle. One is on the handlebar and another is on the frame. Both folding points have a security system so you don’t have to worry the bike would fold itself during a ride.
Dimensions and Sizings
- Bike Weight – 52 lbs (150 kg)
- Max Payload – 330 lbs
- Recommended Rider Height – 5’1″-6’10”
Lighting
Engwe C20 e-bike comes with a front LED light. It gets the needed power from the battery. You can turn it on and off using a switch on the handlebar.
The light is bright enough to ride in the dark. It helps you to see the road and you are also seen by others. However, this model doesn’t have any rear light, let alone a brake light.
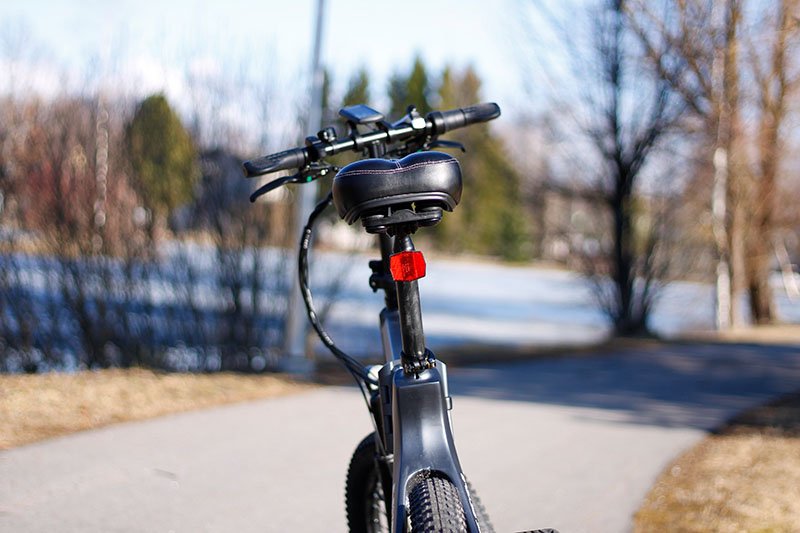
Instead, it has reflectors at the rear and on the spokes. It helps but when riding in the dark, you should have a backlight too. So, it’s something you need to buy on your own when purchasing this bike.
What’s the Difference Between Engwe C20 and C20 Pro?
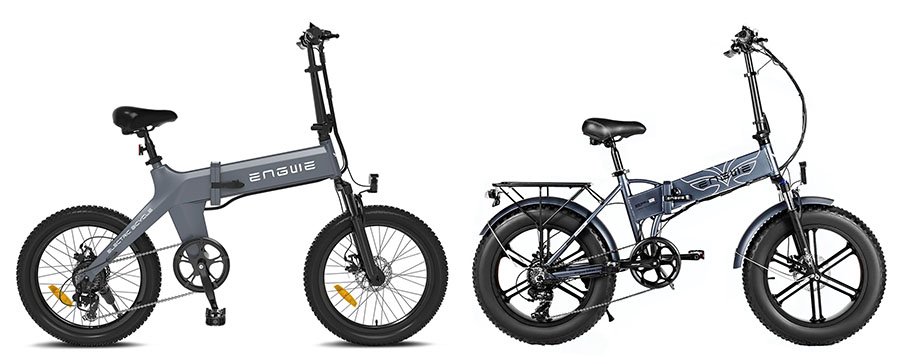
The looks of the two are very similar. However, there is a minor difference that can tell whether it’s a regular or a Pro model.
The C20 Pro has wider tires. The Engwe C20 has tires with the size of 20″x2.4″, while the Pro model has tires with the size of 20″x3″.
Besides that, there is another difference between the two. They have batteries with different energy capacities. To be honest, the difference is huge.
While the battery of the C20 has 374Wh of energy capacity, the battery of the C20 Pro has 691 Wh of energy capacity. It means that the first one can ride about 50 miles and the latter can cover almost 100 miles on a single charge.
And last but not least, the price. Engwe C20 is significantly cheaper than the C20 Pro. So if you don’t need so much mileage and are mostly riding on smooth terrain, buying a non-Pro version of the bike is a smart choice.
C20 is available only in EU and UK stores.
Check out the latest price for the cheaper version of the C20 from the links below:
Engwe C20 Pro vs EP-2 Pro
One big commonality between C20 Pro and EP2 Pro is that both have a folding frame. Also, both bikes have 20″ fat tires. However, the tires of EP-2 are 1 inch wider.
C20 has a better acceleration thanks to the lower weight. On the other hand, EP-2 has a more powerful motor and hence the higher top speed.
The biggest advantage of the new C20 Pro is its much better range. I also like that C20 Pro is much more lightweight.
However, Engwe EP-2 Pro has many more accessories. The C20 Pro doesn’t have a rear rack and rear light.
Related: Engwe EP-2 Pro Full Review
Here are the main differences between C20 Pro and EP2 Pro:
| C20 Pro | EP-2 Pro | |
| 250W | Motor | 750W |
| 16 mph (25 kph) | Top Speed | 28mph (45 kph) |
| 36V 19.2 Ah (691Wh) | Battery | 48V 12.8Ah, 615Wh |
| 95 miles/155km | Range | 50 miles/80km |
| 20″ x 3″ | Tires | 20″ x 4″ |
| Shock-absorber | Fork | Oil Suspension |
| No | Fenders | Yes |
| No | Rear Rack | Yes |
| No | Rear Light | Yes (+ brake light) |
| 52 lbs (24 kg) | Weight | 70 lbs (32 kg) |
| $1200/€900 | Price | $1240/€950 |
Engwe C20 Review Conclusions
To sum it up, I must say that it’s a very solid and practical electric bike.
It has some drawbacks but the pros outweigh them easily. If you are looking for an affordable e-bike to make your everyday commute easier, you can definitely consider Engwe C20.
If you don’t need almost 100 miles of range, then the non-pro version of this e-bike is a great bargain.

The founder and the editor-in-chief of the Electric Wheelers blog. With a previous background in IT, sales, and video editing, he has now established himself as a micromobility expert.
He bought his first e-scooter over 5 years ago and since then has owned dozens of e-scooters and e-bikes. His deep understanding of the technical aspects, coupled with a keen eye for market trends, enables him to provide insightful and reliable content.
His commitment to promoting sustainable and efficient urban mobility solutions has made him a respected voice in the community of eco-friendly transportation enthusiasts.
What size are the brake pads? I’ve just done 2000 miles so need new ones.
I don’t have the exact measurements of the brake pads for the Engwe C20 Pro at the moment. However, given that the brake pads on Engwe bikes aren’t branded, I’d recommend taking your bike to a local bike shop. They can help you find a set of brake pads that fit perfectly. It’s always best to get a hands-on assessment to ensure the right fit and optimal performance.
I just got it!
How do you select ONLY the electric mode without using the pedals???
Just turn on the motor and rotate the half-twist throttle 🙂
Hi Electric Wheelers. Do you have to purchase the bikes yourself to test them or do the merchants ship the bikes for you to test. I have got my own website and I think the content is much better with true life testing
I agree with you. I bought this Engwe bike with my own money.
I agree. I am not in a position yet to buy my own but if I can get this website to generate me some income I will buy the products, review them and then sell them. (first I need somewhere to live lol)
Very nice and elaborate review, kudos! I recently recieved mine and I’d like to add theres a new version with a 500W motor and 48V16ah battery. It’s the best of both worlds with a top speed of just over 40km/h.
Hey, Thanks for the review. do you know any aftermarket rear rack that would fit the c20 Pro. the one listed on the engwe website is very expensive.
thanks
Thanks for the kind words! Unfortunately, I don’t have any suggestions for the rear rack.
In your opinion which one would you choose for food delivery job, C20 pro or EP-2?
I think C20 Pro would be better for a food delivery job because it has a longer range. I know one food courier who bought C20 Pro and he is very satisfied with it.