It is already thought the NIU KQi2 Pro could become a serious competitor to popular Xiaomi and Segway scooters.
Since the last statement is quite bold, I decided to buy myself a NIU KQi2 scooter and test the scooter out myself.
Could the Niu KQi2 Pro be the best electric scooter under $500 currently available? In this review, we are going to find out!
Electric Wheelers is reader-supported. Although we independently research and test products, we may receive a commission on purchases made from our chosen links. Read more…
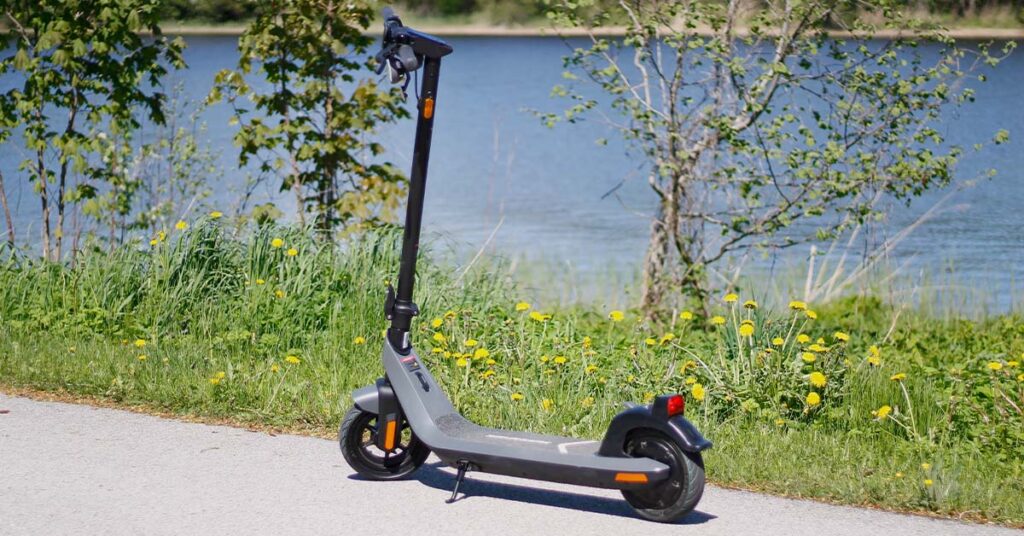
NIU KQi2 Pro Overview
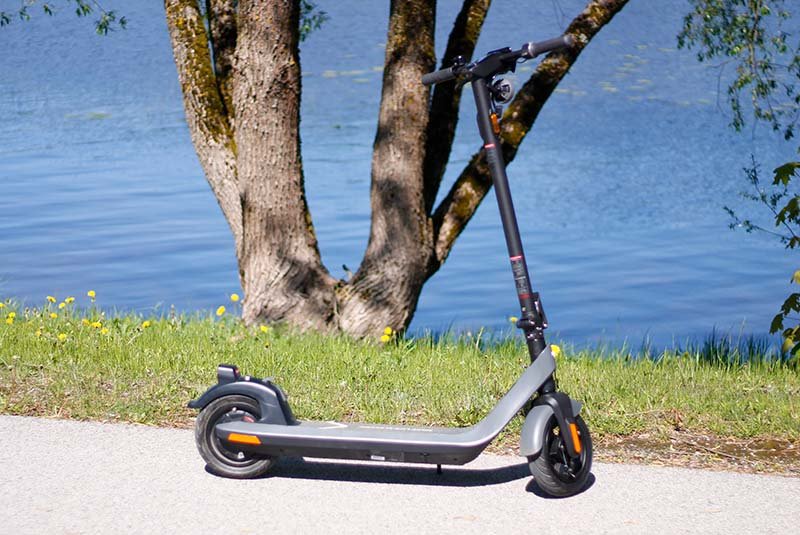
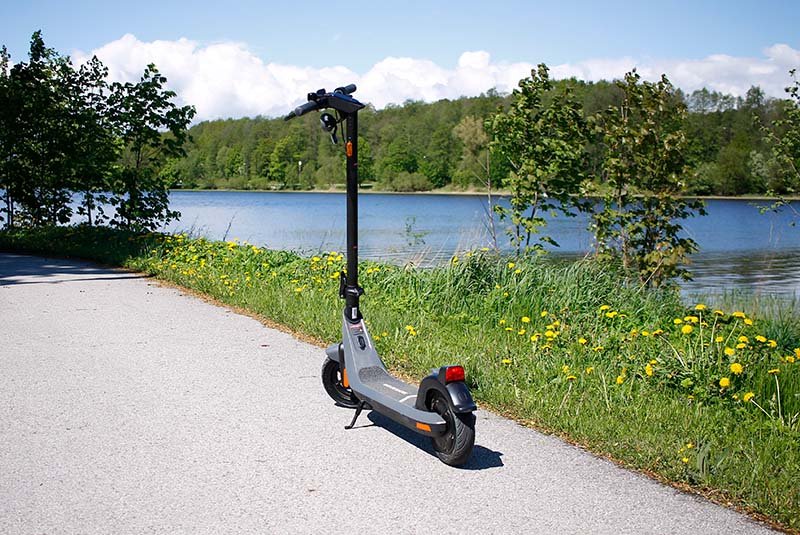
The NIU KQi2 Pro is a commuter scooter. If the distance of your daily commute is up to 25 km (16 miles), this scooter would be a strong choice.
It’s designed for people who are at least 14 years of age and weigh up to 100 kg (220 lbs). So if you weigh more than that, you need a more powerful machine.
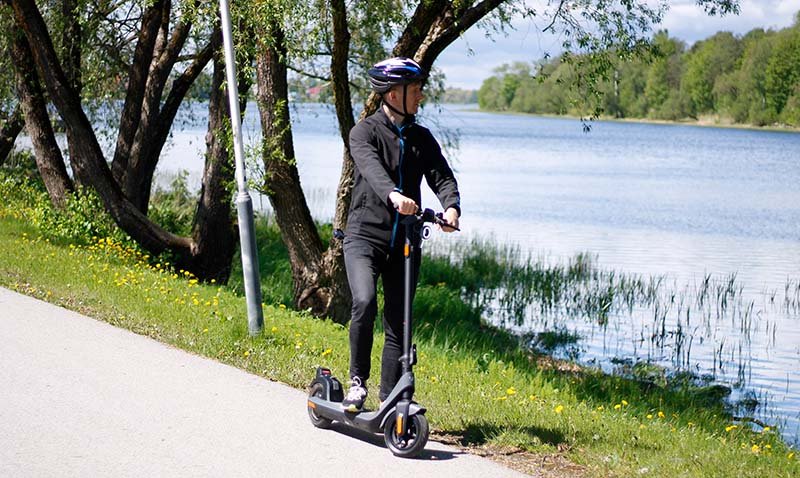
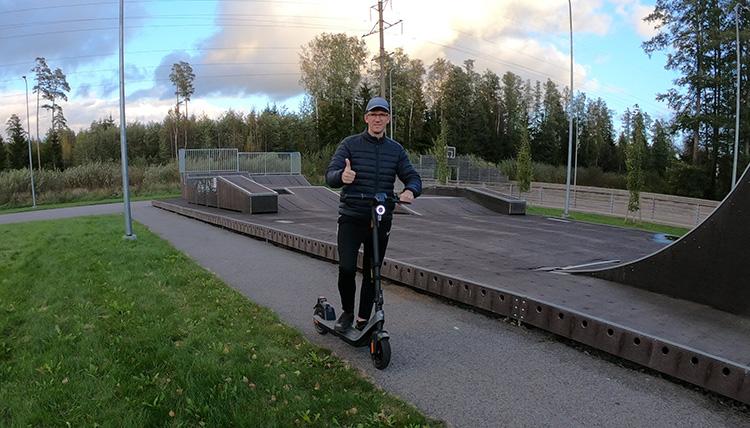
I weigh about 90 kg (~200 lbs) and the scooter can easily accelerate and handle some moderate inclines.
You should also know that since the scooter doesn’t have suspensions, it is mostly meant for the urban environment. So, if you like to do some occasional off-roading, this scooter might not be suitable for that.
I ride mostly on bike lanes and pavements and for that, the KQi2 Pro is perfect.
NIU KQi2 Pro Specs
| Motor | 300W Rear Hub Motor |
| Top Speed | 25 km/h (EU Model) / 17.4 mph (US Model) |
| Battery | 365 Wh |
| Max Range | 40 km / 24.9 miles |
| Recharge Time | 7 hours |
| Brakes | Front Drum + Rear Electric + Regenerative Braking |
| Suspension | – |
| Weight | 18.42 kg / 40.6 lbs |
| Weight Capacity | 100 kg / 220 lbs |
| Tires | 10″ Pneumatic Tubeless Tires |
| Lights | Front & Rear LED Lights |
| Hill Grade | 15% (~9 Degrees) |
| Dimensions | 117 x 116 x 54 cm (46.1″ x 48″ x 20.5″) |
| Folded Dimension | 117 x 50 x 54 cm (46.1″ x 19.8″ x 20.5″) |
| IP Rating | IP54 |
Pros
- Great stopping power
- Good hill-climbing
- Long warranty
- Customizable design
- Affordable price
Cons
- No suspensions
- No zero-start feature
Unboxing and Assembling
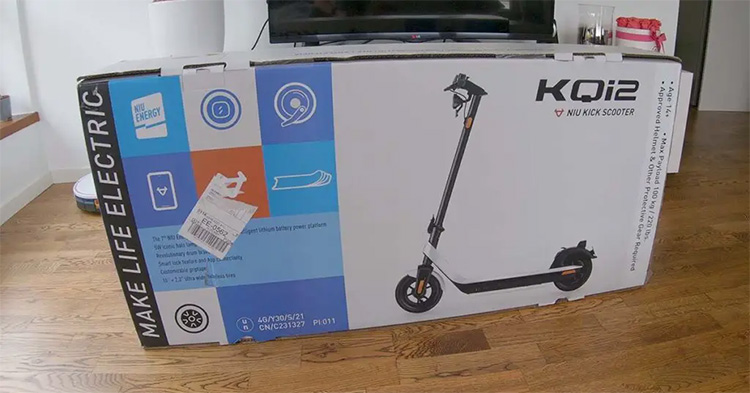
The moment I laid eyes on the Niu KQi2 Pro’s packaging, I was captivated by the colorful box design. I was very excited to quickly unbox it to go outside for testing.
Here’s a list of items I found from the box:
- Extra grip tape for the deck
- Manual
- Extension nozzle for easier air-filling
- Wrench
- 8 screws
- Charger
- And the Niu KQi2 electric scooter of course
The scooter already has an excellent grip tape on the deck. An extra one is a good addition if the first one gets worn out or if you want to change the design.
The manual is comprehensive. There is a guide for easy assembly, riding instructions, and some safety warnings. You should definitely take a look at it.
Assembling Takes Just a Couple of Minutes
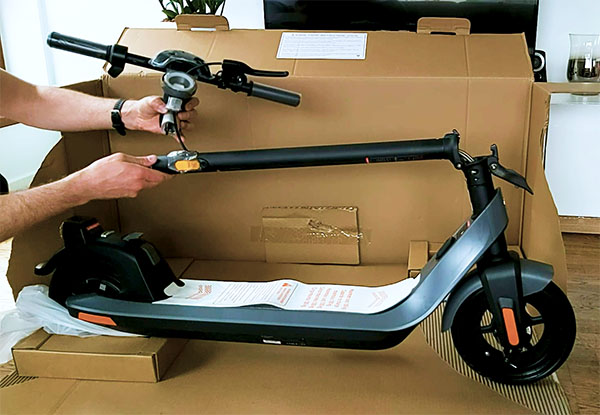
The scooter comes almost fully assembled. Basically, you just need to install the handlebar.
The handlebar is loose and is connected only with a cable. So be careful not to damage the wiring.
Also, you can see two cables with loose ends. One comes from the display and the other comes from the handlebar post.
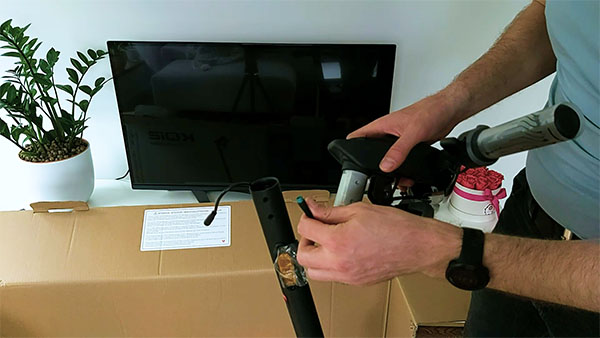
Before you can install the handlebar, connect those cables.
Then, push the cables inside of the handlebar post and attach the handlebar. Use the screws and a wrench to fix the handlebar in the correct position.
Now, the scooter is fully assembled. It’s time to take it for a first spin.
NIU KQi2 Performance
Speed and Acceleration
The Niu KQi2 Pro electric scooter is equipped with a 300W rear hub motor. However, the peak power of the motor is 600W.
The scooter comes with a conveniently located thumb throttle on its right handlebar, streamlining the scooter’s acceleration process.
However, it’s worth noting that there isn’t a zero-start feature. This means riders need to give it an initial manual push or kick to get it rolling before the throttle activates the motor. This feature is purely for safety ensuring unintended acceleration is minimized.
Once in motion, I found the scooter’s acceleration to be both smooth and gradual. Even if I pushed the throttle fully, I was not jolted by a sudden burst of speed.
Impressively, while maintaining this non-aggressive acceleration, the scooter still manages to reach its top speed within just a few seconds, making it efficient without sacrificing rider comfort.
Top Speed is Limited
The top speed is 25 km/h for European models and 17.4 mph for US models. However, the top speed of the same scooter is limited to 20 km/h if you buy it from Germany. It’s all because different countries have different laws.
I have an EU model and I weigh about 90 kg (198 lbs). The scooter reached 25 km/h speed quite easily.
James Heath
I am pretty sure the scooter has enough power to go even faster. The top speed is limited to these numbers to be legal by the law.
For me, the top speed of 25km/h for such a commuter scooter is exactly right. It’s faster than bicycles, but not so fast as to become dangerous to pedestrians.
One cool feature is that you can set your own speed limit below the scooter’s maximum. It can be done using Niu’s app. So, if you let your kid ride the electric scooter, it may be useful to limit the speed for safety concerns.
Related: NIU KQi3 Review
Battery and Range
The KQi2 has a battery of 365 Wh of energy capacity. Niu claims that the maximum range is 40 km. In real life, you should never assume to get that result. Manufacturer range tests are usually made in ideal conditions, which you rarely see in reality.
In my first range test, I used the top performance mode and managed to ride 25 km (15.5 miles). It’s actually a better result than most other scooters in this price range.
Then I discovered that there is an energy recovery setting in the app.
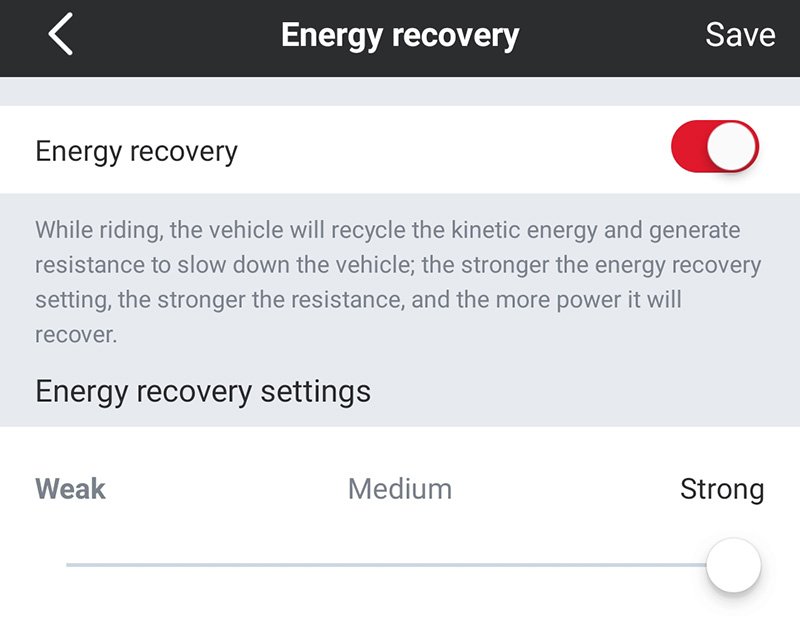
I recharged the battery (took about 7 hours) and went for another range test. This time the energy recovery setting was set to ‘strong’.
The range improved a bit but not much. On my second range test, the battery lasted for 27.5 km.
Hill Climbing
The official hill grade of NIU KQi2 is 15%. It means that the scooter should be able to tackle hills up to 9 degrees.
I tested the hill-climbing capabilities of KQi2 on the bridge ramp. I’m not sure what was the exact hill grade but it was quite steep.

Surprisingly, the scooter managed to climb this incline very easily. The top speed on this bridge ramp was 20 km/h (12.5 mph).
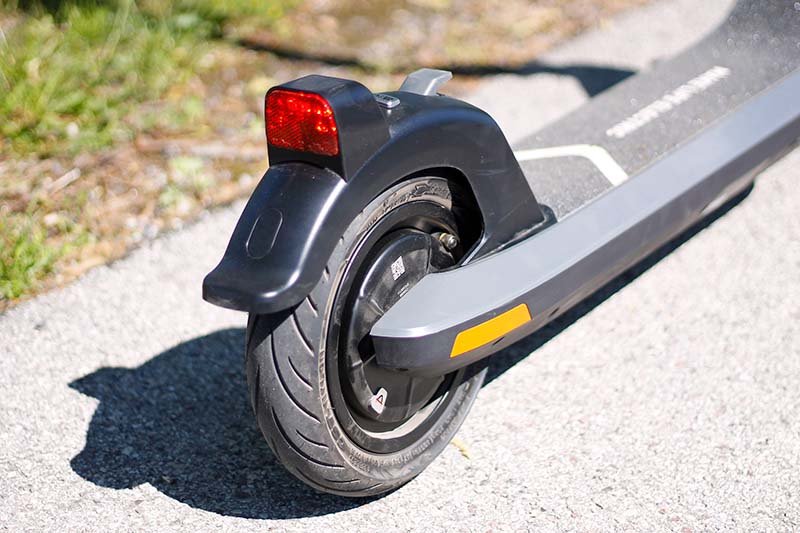
Brakes
The scooter comes with a drum brake at the front and an electric brake at the rear. Both brakes are activated from the single brake lever on the left side of the handlebar. These double brakes provide great stopping power. At the same time, the braking is really smooth.
Both brakes have an anti-skid feature. Also, the brakes are designed so you would never fly over the handlebars in case of strong braking.
Additionally, the scooter has regenerative braking. It converts the friction from your brakes into energy to propel you forward. Basically, it’s the same technology used in modern sports cars.
How’s the NIU KQi2 Pro Performance 2 Years Later?
It’s been almost two years since I first introduced the NIU KQi2 Pro into my daily routine, and I must say, it’s been a journey worth every mile.
Having clocked in hundreds of miles on this trusty steed, one might expect signs of wear and tear or a dip in performance. Yet, the KQi2 Pro defies those expectations.
The battery remains as robust and efficient as the day I unboxed it. There’s no discernible drop in its capacity or its ability to hold a charge. Similarly, the top speed hasn’t wavered, and the ride quality remains consistently smooth and reliable.
For those skeptical about the longevity of cheap electric scooters, my firsthand experience with the KQi2 Pro stands as a shining example of what’s possible when craftsmanship meets passion.
NIU KQi2 Pro Features
Frame
The frame of the scooter is made from aerospace-grade aluminum. It seems very solid and durable. At the same time, the scooter weighs just 18 kg (41 lbs) and can withstand riders up to 100 kg (220 lbs).
The height of the handlebar felt just right for me (I am 6 foot 3, which is ~191 cm). However, I am sure the scooter is comfortable for shorter people as well.
Also, all the wiring is integrated into the frame. It makes the overall look very neat and stylish.
Portability
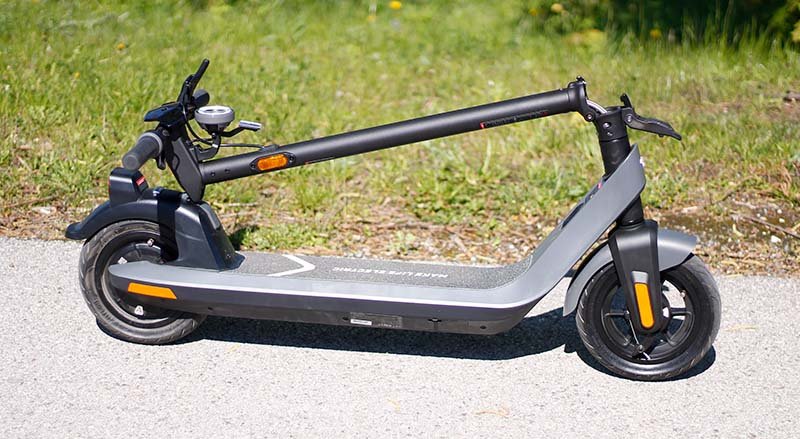
On the scale of portability, the Niu KQi2 is rather portable. As mentioned above, the weight of the scooter is 18 kg (41 lbs). It means that it’s light enough to carry for a couple of flights of stairs.
Although the handlebars are not folding, the scooter can still easily fit into the trunk of most cars.
The folding mechanism of KQi2 seems very good. There is no stem wobbling when riding.
It takes just a couple of seconds to fold or unfold the scooter. Also, there is a locking mechanism at the rear, so it’s easier to carry the scooter.
Wheels and Tires
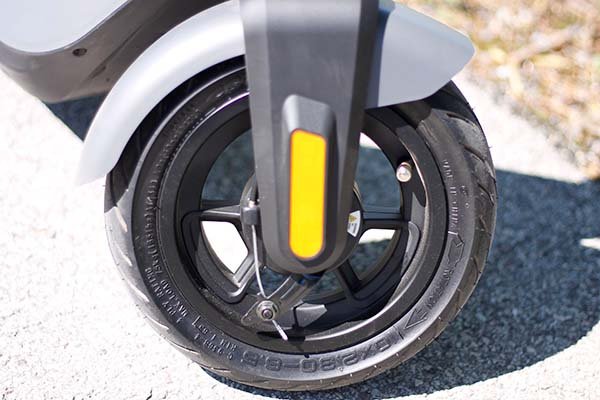
Niu KQi2 Pro comes with 10-inch wheels. Most cheap electric scooters have smaller wheels than 10 inches. So, KQi2 is definitely a step up here.
Also, the scooter has tubeless pneumatic tires. These tires provide much better ride quality than solid tires. Although the scooter doesn’t have a suspension, pneumatic tires help to absorb some bumps on the road.
If you lower the tire pressure to the lower limit, you can increase the ride quality even more.
James Heath
However, don’t expect to have a great ride experience if you go on an extra bumpy road. I tried to ride on a cobblestone road and got a quite an awful brain massage.
Deck
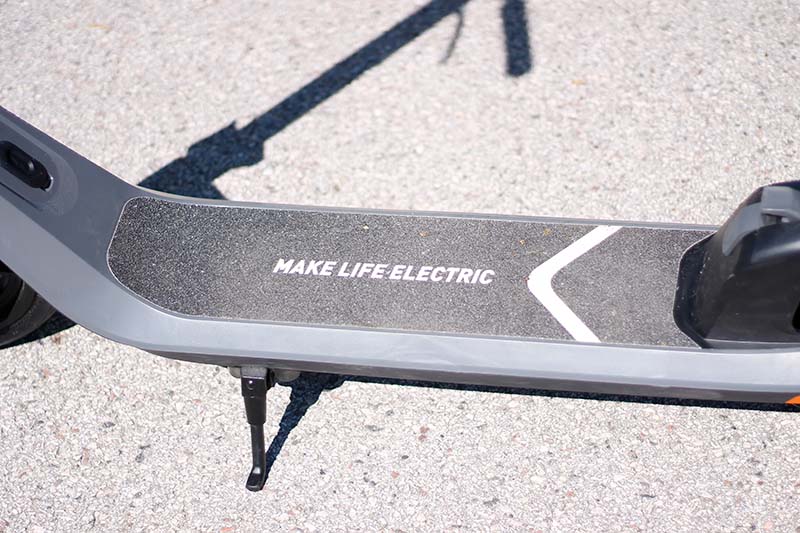
The Niu kick scooter comes with a nice grip tape installed on a deck. It feels like sandpaper and provides a good grip even if your shoe soles are a bit wet. In addition to that, Niu has provided one spare grip tape.
The deck itself is 16 cm (6.3″) wide, which is about the average in this price class. For me, there was plenty of room to accommodate my feet comfortably. It’s even possible to place your feet next to each other.
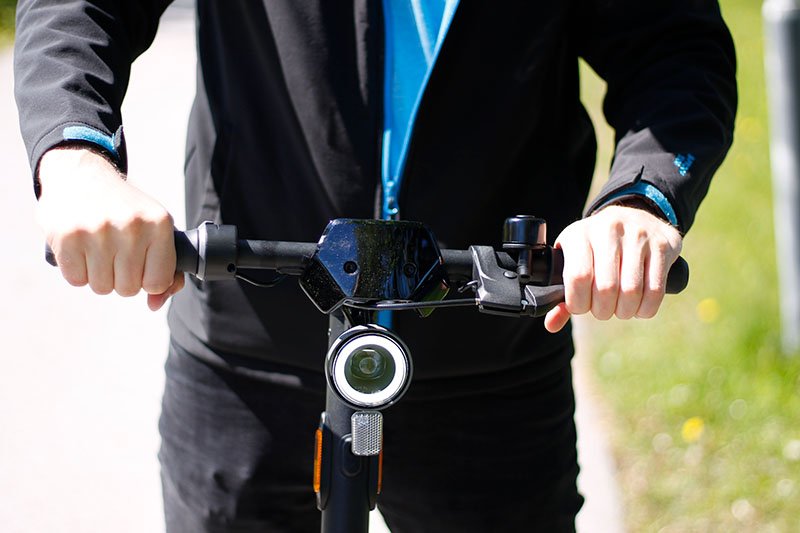
Handlebar

On the left, you can find a brake lever and a bell. On the right, there’s a thumb accelerator. In the middle, you can find a super-sleek LED dashboard.
The display is bright enough even under direct sunlight. You can read there the current speed, battery level, and speed mode. However, I wish I could see the trip meter from the display as well.
The width of the handlebar is 54 cm (21.3″). It’s a bit wider compared with other similar scooters in its class. Also, on the right side, there is enough room to install the phone mount.
Lights
If the NIU KQi2 electric scooter is approaching you, the stylish halo front light is probably one of the first things you notice. It’s always turned on. Inside this halo light, there is a proper night light as well. It provides enough lighting to be able to ride in the dark.
Additionally, there is a red rear light with a brake light feature. Plus, there are reflectors on the side and front. So, Niu has done a pretty good job in the lighting area.
Is NIU KQi2 Waterproof?
The Niu KQi2 Pro electric scooter comes with an IP54 water-resistant rating. It means that the scooter is protected from low-pressure spray. This kind of water resistance level is often referred to as splashproof. So that means, that Niu KQi2 is definitely not waterproof.
Although we have listed this scooter on the list of rain-resistant scooters, you should still try to avoid riding in heavy rain. Braking distance is much longer in wet weather.
However, if you are extra careful and don’t ride through the puddles, riding in the light rain is not forbidden.
Does NIU Electric Kick Scooters Have an App?
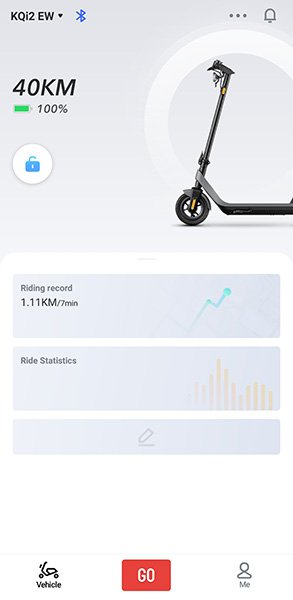
The Niu electric kick scooter app is available in the App Store and Google Play. The scooter connects to the app via Bluetooth.
In the NIU app, you can see ride statistics and change some settings of the scooter. Also, thanks to the app, the scooter can be updated over the air.
How to Bind a Scooter With a Niu App?
Although the app lets you choose the binding method, you can only use Bluetooth to bind the kick scooter. The other method works only for their seated electric scooters.
Also, you must turn on the scooter. Otherwise, the app and scooter won’t see each other.
Then follow the instructions in the app to complete the binding process.
- Short press the power button to confirm the matching
- Give your scooter a name
- Follow the prompts on the app
- Press brake lever
- Press the accelerator
- Watch the short animated riding tutorial
Congratulations! Now the scooter is paired with your smartphone.
Now the scooter is ready for the first ride. However, you probably notice that the scooter runs really slow at first.
Don’t worry about that! You have to ride for about 200 meters then you can increase the speed limit from the app.
To remove the speed limiter, follow these steps:
- Open the Niu app
- Click the three dots on the upper right corners
- Choose ‘Custom Mode’ from the menu
- Enable the custom mode from the upper right corner
- Slide the speed limiter to the preferred limit
Warranty
The Niu KQi2 comes with a really strong warranty. The most expensive parts of the scooter are covered with a 2-year warranty. It’s really exceptional since most other manufacturers provide only a 1-year warranty at best. It’s not rare if some parts like the battery are covered only for 6 months.
If Niu can have such a good warranty policy, it definitely shows their confidence in the quality of their scooters.
NIU KQi2 Pro Price and Availability
Niu KQi2 Pro is available in the NIU EU online shop as well as the NIU USA online shop. Also, the scooter is available on Amazon. Additionally, I have seen the scooter in many offline tech stores. So Niu has made its scooter very easily accessible.
The price is very similar in all online shops. You can get the scooter for €499 in Europe and $599 in the USA. However, the Niu scooters I have seen in different retail shops have been a bit pricier than that.
Are There Alternatives?
KQi2 Pro vs Other Niu Scooters
Niu KQi1 Pro is notably cheaper than KQi2 Pro. You can get it for $299 but you have to consider shorter range and lower top speed.
If you have a bit more to spend, look for a NIU KQi3. It costs a couple of hundred more, but you get a longer range and higher top speed. Also, the KQi3 comes with better brakes.
Learn more about all Niu scooters from our comprehensive overview of NIU electric scooters.
Niu vs Xiaomi
Since Xiaomi is one of the most popular electric scooter brands and NIU just started with electric kick scooters, we decided to make an in-depth comparison between them.
I borrowed a Xiaomi Pro 2 from my friend and compared acceleration, stopping power, range, and other areas to see which scooter was better. You can check out the results of my testing from this video.
Both scooters have similar top speed and even the range was the same. Xiaomi has a disc brake, while the Niu has a drum brake. But Niu had much shorter braking distance. In terms of portability, Xiaomi Pro 2 is a bit smaller and weighs less.
Both scooters are priced around $500. However, Xiaomi doesn’t have such a convenient online store for its electric scooters.
Niu vs Segway
If you are looking for something more affordable, then you can consider E22 or F25. But these scooters have much less range and provide a slower top speed.
Segway F40 provides almost the same specifications at a similar price. The most notable difference is the front hub motor instead of Niu’s rear hub motor.
Our Take on the NIU KQi2 Pro
To sum it up, I can easily say that the NIU KQi2 Pro is an excellent electric kick scooter. It has everything to become the most popular electric scooter in its class:
In the beginning, we posed the question: “Is the NIU KQi2 Pro the best electric scooter for $500?” After extensive testing, traversing various terrains, and pushing its capabilities to the limit, I can confidently lean towards a resounding ‘yes’.
The scooter’s performance, build quality, and features are unparalleled in its price bracket. It’s not just about the value for money, but the sheer joy and reliability it brings to every ride. While no scooter is without its flaws, the NIU KQi2 Pro comes strikingly close to perfection for its price point.
So, if you are looking for a trustworthy commuter scooter, you can definitely consider NIU KQi2.

The founder and the editor-in-chief of the Electric Wheelers blog. With a previous background in IT, sales, and video editing, he has now established himself as a micromobility expert.
He bought his first e-scooter over 5 years ago and since then has owned dozens of e-scooters and e-bikes. His deep understanding of the technical aspects, coupled with a keen eye for market trends, enables him to provide insightful and reliable content.
His commitment to promoting sustainable and efficient urban mobility solutions has made him a respected voice in the community of eco-friendly transportation enthusiasts.